How you can Tighten a Faucet Deal with: Cease Leaks and Finish Annoying Wobbles
Is your faucet deal with unfastened, wobbly, or spinning uselessly? A unfastened faucet deal with is not simply annoying; it could additionally result in drips, leaks, and wasted water, rising your water invoice and probably inflicting water harm. Thankfully, tightening a faucet deal with is commonly a easy DIY activity that requires minimal instruments and experience. This complete information will stroll you thru the method, offering detailed directions, troubleshooting ideas, and knowledgeable recommendation to make sure a profitable consequence. We’ll cowl numerous faucet varieties and deal with designs, empowering you to confidently deal with this frequent plumbing drawback.
Understanding Faucet Deal with Mechanics
Earlier than diving into the restore course of, it is useful to grasp the essential mechanics of a faucet deal with. Taps management water move by utilizing a valve that opens and closes. The deal with is linked to this valve, permitting you to control the water. Over time, the connection between the deal with and the valve stem can loosen as a result of put on and tear, corrosion, or just repeated use. Understanding this connection helps you diagnose the issue and select the proper tightening technique.
There are a number of frequent forms of taps, every with its personal deal with design:
- Compression Taps: These older-style taps use separate cold and hot handles. Tightening entails compressing a rubber washer towards a valve seat.
- Cartridge Taps: These taps have a single deal with that controls each temperature and move. A cartridge inside the tap physique regulates the water combine.
- Ball Taps: Much like cartridge taps, ball taps use a ball valve to manage water move.
- Ceramic Disc Taps: These fashionable taps use ceramic discs to manage water move, providing clean operation and long-lasting sturdiness.
Figuring out your faucet sort is step one in studying the way to tighten faucet deal with appropriately.
Important Instruments and Supplies
Gathering the proper instruments and supplies earlier than you begin will make the method smoother and extra environment friendly. Here is a listing of important objects:
- Screwdrivers: A set of screwdrivers, together with each Phillips head and flathead, is essential for eradicating deal with screws.
- Allen Wrenches (Hex Keys): Many fashionable taps use Allen screws to safe the deal with. A set of Allen wrenches is crucial.
- Adjustable Wrench: An adjustable wrench can be utilized to tighten nuts and different fittings inside the tap physique.
- Penetrating Oil (e.g., WD-40): This will help loosen cussed screws or corroded elements.
- Plumber’s Tape (Teflon Tape): Used to seal threaded connections and stop leaks.
- Alternative Components (Optionally available): When you suspect worn-out elements, reminiscent of O-rings or screws, have replacements available.
- Clear Rags or Sponges: For cleansing and wiping up spills.
- Small Container: To carry small elements like screws and washers.
Earlier than you start, shut off the water provide to the tap to stop flooding. Find the shut-off valves underneath the sink and switch them clockwise till absolutely closed. If you do not have shut-off valves, you may have to shut off the primary water provide to your home.
Step-by-Step Information: Tightening Totally different Faucet Deal with Sorts
The precise process for tightening a faucet deal with varies relying on the tap sort. Listed below are detailed directions for frequent faucet designs:
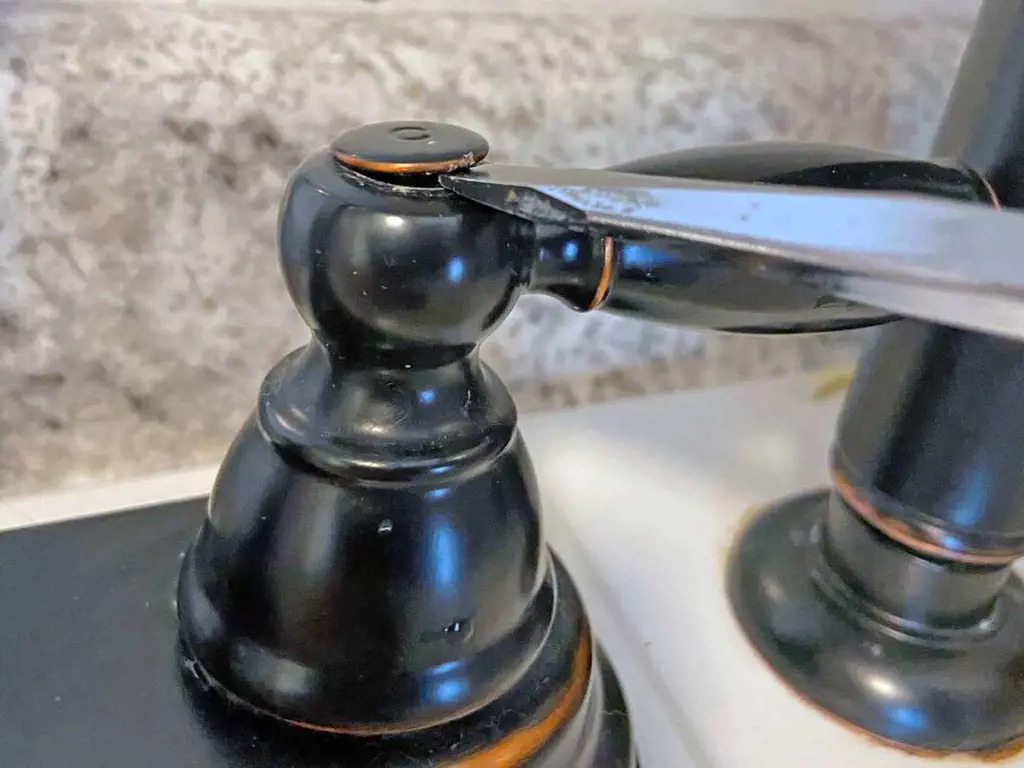
Tightening a Compression Faucet Deal with
- Find the Screw: Compression faucet handles usually have an ornamental cap on prime. Use a small flathead screwdriver to softly pry off the cap, revealing the screw beneath.
- Tighten the Screw: Use a screwdriver to tighten the screw. Watch out to not overtighten, as this might strip the screw or harm the deal with.
- Check the Deal with: Flip the deal with to see if it is now safe. If it is nonetheless unfastened, proceed to the following step.
- Examine the Washer: If tightening the screw would not work, the rubber washer inside the tap could also be worn out. Take away the deal with and stem meeting to examine the washer. Exchange the washer if it is cracked, worn, or broken.
- Reassemble the Faucet: Reassemble the tap, ensuring all elements are correctly aligned.
Tightening a Cartridge Faucet Deal with
- Find the Allen Screw: Cartridge faucet handles typically have a small Allen screw on the facet or again of the deal with.
- Loosen the Allen Screw: Use an Allen wrench to loosen the screw. Do not take away the screw fully; simply loosen it sufficient to take away the deal with.
- Take away the Deal with: Gently pull the deal with straight as much as take away it.
- Tighten the Retaining Nut: Beneath the deal with, you may discover a retaining nut that holds the cartridge in place. Use an adjustable wrench to tighten this nut. Watch out to not overtighten.
- Reinstall the Deal with: Exchange the deal with and tighten the Allen screw.
- Check the Deal with: Check the deal with to make sure it is safe and operates easily.
Tightening a Ball Faucet Deal with
- Loosen the Set Screw: Ball faucet handles normally have a set screw on the facet of the deal with. Use an Allen wrench to loosen this screw.
- Take away the Deal with: Pull the deal with off the tap.
- Tighten the Adjustment Ring: Beneath the deal with, you may discover an adjustment ring. Use a particular ball faucet wrench or a pair of pliers to tighten this ring.
- Reinstall the Deal with: Exchange the deal with and tighten the set screw.
- Check the Deal with: Test the deal with to ensure it is tight and features correctly.
Tightening a Ceramic Disc Faucet Deal with
- Find the Set Screw: Ceramic disc faucet handles usually have a set screw on the facet or again of the deal with.
- Loosen the Set Screw: Use an Allen wrench to loosen the set screw.
- Take away the Deal with: Pull the deal with straight as much as take away it.
- Tighten the Cartridge Nut: Beneath the deal with, you may discover a nut that holds the ceramic disc cartridge in place. Use an adjustable wrench to tighten this nut.
- Reinstall the Deal with: Exchange the deal with and tighten the set screw.
- Check the Deal with: Check the deal with to make sure it is safe and operates easily.
Troubleshooting Frequent Points
Typically, tightening a faucet deal with is not as easy because it appears. Listed below are some frequent points you would possibly encounter and the way to handle them:
- Stripped Screws: If the screw is stripped, it will not tighten correctly. Strive utilizing a bigger screw or wrapping the present screw with plumber’s tape to create a tighter match. If that does not work, chances are you’ll want to exchange the deal with or your entire faucet.
- Corroded Components: Corrosion could make it tough to take away or tighten elements. Apply penetrating oil to loosen corroded screws or nuts. Let the oil sit for a couple of minutes earlier than trying to take away the half.
- Worn-Out Washers or O-Rings: If tightening the deal with would not cease the leak, the washers or O-rings inside the tap could also be worn out. Exchange these elements to make sure a correct seal.
- Deal with Nonetheless Unfastened After Tightening: If the deal with remains to be unfastened after tightening all of the screws and nuts, the valve stem itself could also be broken. On this case, chances are you’ll want to exchange your entire faucet.
Preventive Upkeep Ideas
Common upkeep will help forestall faucet deal with issues and prolong the lifetime of your faucet. Listed below are some ideas:
- Keep away from Overtightening: Overtightening screws or nuts can harm the tap and make it harder to restore sooner or later.
- Clear Repeatedly: Clear your taps usually to take away mineral deposits and stop corrosion. Use a light cleaning soap and water resolution and keep away from abrasive cleaners.
- Lubricate Shifting Components: Periodically lubricate the transferring elements of your faucet with plumber’s grease to maintain them working easily.
- Exchange Worn Components: Exchange worn washers, O-rings, and different elements as quickly as you discover them deteriorating.
Selecting the Proper Alternative Components
When changing faucet elements, it is essential to decide on the proper ones. Listed below are some ideas:
- Establish the Faucet Mannequin: Realizing the make and mannequin of your faucet will allow you to discover the right substitute elements. Search for a label or stamp on the tap physique.
- Take the Outdated Half with You: When searching for substitute elements, take the previous half with you to make sure a correct match.
- Purchase High quality Components: Spend money on high-quality substitute elements to make sure long-lasting efficiency.
- Take into account a Faucet Restore Package: A faucet restore package contains all of the frequent substitute elements for a selected faucet mannequin. This is usually a handy and cost-effective possibility.
When to Name a Plumber
Whereas tightening a faucet deal with is commonly a easy DIY activity, there are occasions when it is best to name an expert plumber. Listed below are some conditions the place skilled assistance is beneficial:
- You are Uncomfortable with Plumbing Repairs: When you’re not snug working with plumbing, it is best to go away the job to an expert.
- You Cannot Establish the Faucet Sort: When you’re not sure about the kind of faucet you have got, a plumber will help you establish it and decide the perfect plan of action.
- The Downside is Advanced: If the tap drawback is advanced or entails a number of points, a plumber has the experience to diagnose and restore it.
- You have Tried All the pieces and It is Nonetheless Leaking: When you’ve tried tightening the deal with and changing the washers, and the tap remains to be leaking, it is time to name a plumber.
- You are Coping with Outdated or Corroded Plumbing: Outdated or corroded plumbing may be fragile and simply broken. A plumber has the instruments and expertise to work with a lot of these techniques safely.
The Worth of a Tight Faucet Deal with
Realizing the way to tighten a faucet deal with is a precious ability for any house owner. Not solely can it prevent cash on water payments and stop water harm, nevertheless it additionally demonstrates your skill to keep up your house and deal with minor repairs. By following the steps outlined on this information, you possibly can confidently deal with this frequent plumbing drawback and preserve your taps in prime working situation. The power to carry out this easy restore will save you time and money in comparison with calling an expert for a minor challenge. Furthermore, addressing a unfastened faucet deal with promptly prevents additional harm and potential expensive repairs down the highway. A good, correctly functioning faucet deal with is a testomony to your proactive residence upkeep and ensures environment friendly water utilization. Our intensive expertise exhibits that common faucet upkeep, together with tightening handles and changing worn elements, considerably extends the lifespan of your plumbing fixtures.
